Washing walls before painting is one of the most critical steps for achieving a professional-looking paint job. Clean walls provide better paint adhesion, prevent peeling, and ensure your new paint looks smooth and lasts longer.
Proper wall preparation makes the difference between a paint job that lasts years and one that starts failing within months. Clean walls provide the foundation your new paint needs to adhere properly and maintain its appearance over time.
Many homeowners skip this step, thinking they can apply paint directly over existing surfaces. However, walls accumulate dust, grease, fingerprints, and other contaminants that create barriers between your wall surface and new paint.
Key Takeaways
- Clean walls are essential for proper paint adhesion and prevent peeling and premature failure.
- Use mild detergent and warm water to prep walls effectively with a damp cloth or sponge.
- Always remove dirt, dust, and grease buildup before painting, especially on kitchen walls.
- Allow interior walls to dry completely for 24 hours after cleaning to prevent moisture issues.
- Scrape away loose paint and old paint, then sand rough areas smooth.
- Call OnDemand Painters for complex wall conditions or large painting projects.
Why You Need to Wash Walls Before Painting
Paint requires a clean surface for proper adhesion. When you apply new paint over dirty walls, the paint bonds to the dirt layer rather than the actual wall surface. This weak connection leads to premature peeling, uneven coverage, and poor durability.
Dust particles act as a barrier that prevents paint from making direct contact with the wall. Even thin layers of dust can cause your paint job to appear uneven or develop adhesion problems within the first year.
Kitchen walls present particular challenges due to grease buildup from cooking. This invisible film repels paint, creating areas where coverage appears thin or patchy. Professional painters always include wall cleaning in their preparation process because thorough prep work extends the life of any paint job.
What You’ll Need to Wash Walls
Basic Cleaning Tools
Microfiber cloths work well for wall cleaning because they capture dust and dirt particles effectively. Keep several clean cloths available for different stages of the cleaning process.
Use a cellulose sponge for applying cleaning solutions to wall surfaces. Choose non-abrasive sponges to avoid damaging existing paint. A vacuum with brush attachment removes loose dust and cobwebs before wet cleaning begins.
Protect your floors with drop cloths. Keep a clean putty knife available for removing loose paint discovered during cleaning. Fine grit sandpaper and a sanding block handle rough areas that need smoothing before painting.
Cleaning Solutions That Work
Most walls respond well to a simple mixture of dish soap and warm water. Use a small amount of soap per gallon of water to avoid leaving residue that could interfere with paint adhesion.
White vinegar mixed with equal parts water creates an effective cleaning solution for general dirt and grime. For stubborn stains, create a paste using baking soda and water. This mild abrasive removes marks without damaging the underlying wall surface.
Kitchen walls require stronger degreasing solutions due to cooking residue. Use a grease-cutting dish soap mixed with warm water for these high-contamination areas.
Step-by-Step Guide to Prep Walls for Painting
Remove Dust and Cobwebs
Begin every wall cleaning project by removing loose dust and debris. Use your vacuum with the brush attachment to cover the entire wall surface systematically.
Pay particular attention to corners where cobwebs accumulate and baseboards where dust settles. Work from top to bottom so falling particles do not contaminate areas already cleaned.
After vacuuming, wipe surfaces with a damp cloth to capture any remaining loose dust. This preliminary step prevents turning dust into mud when you begin wet cleaning.
Test Your Cleaning Solution
Before cleaning the entire room, test your chosen cleaning solution in a small, inconspicuous area. Some paints, particularly older formulations, can react negatively to certain cleaning products.
Apply a small amount of cleaning solution to the test area and observe for several minutes. If the test area shows no problems, proceed with the full cleaning process.
Clean from Top to Bottom
Work in manageable sections approximately three feet wide, starting at the top of each wall and moving downward. Dip your sponge in cleaning solution and remove excess water so the sponge is damp but not dripping.
Apply the cleaning solution using circular motions with light pressure. Heavy scrubbing can damage existing paint or create surface irregularities that show through new paint.
After cleaning each section, rinse with clean water using a separate sponge or cloth. This step removes any residual cleaning agent that might interfere with paint adhesion.
Kitchen Walls and Grease Removal
Kitchen walls require additional attention due to grease accumulation from cooking activities. Areas near stoves and sinks typically have the heaviest contamination.
Use a stronger degreasing solution in these locations. You may need to clean heavily soiled areas multiple times to remove all grease residue completely.
Bathroom Wall Cleaning
Bathroom walls face unique challenges from soap buildup and mineral deposits. Use your vinegar solution to address these water-related contaminants effectively.
Focus on areas around sinks, tubs, and showers where soap scum accumulates. Provide adequate ventilation during bathroom wall cleaning to prevent moisture buildup.
Dealing with Problem Areas
Removing Loose Paint and Peeling Paint
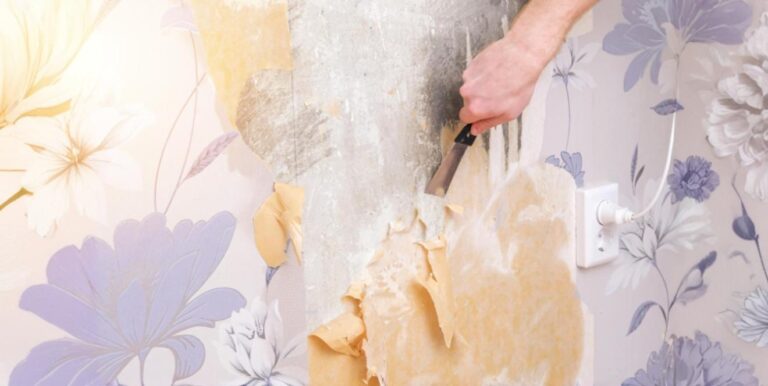
During cleaning, you may discover areas where paint is loose or peeling. Use your putty knife to gently scrape away any paint that comes off easily.
Sand rough areas with fine grit sandpaper to create a smooth surface for new paint. Use your sanding block to maintain even pressure and avoid creating low spots.
Handling Stains and Marks
Different stains require specific treatment approaches. For crayon marks, apply a small amount of mineral oil first, then clean with your standard solution.
Scuff marks often respond well to baking soda paste applied gently with a soft cloth. Ink stains may come off with rubbing alcohol applied to a clean cloth.
Filling Holes and Imperfections
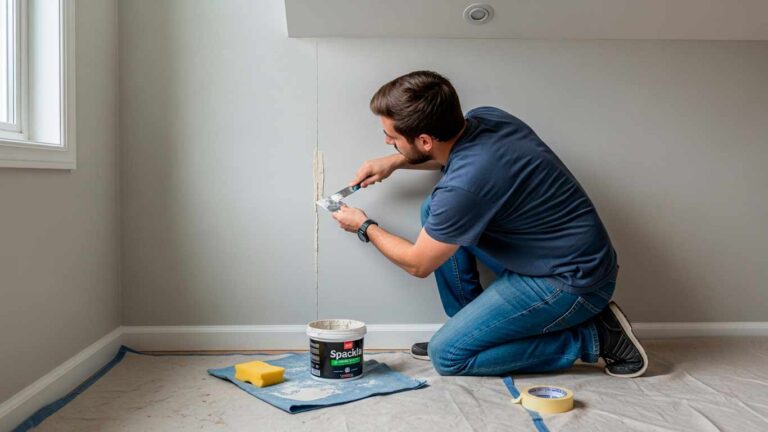
Small holes and dents should be filled with spackling compound after cleaning is complete. Sand filled areas smooth once the compound has dried completely.
Prime all repaired areas before applying your finish paint. Repairs often have different absorption rates than the surrounding wall surface.
Drying and Final Prep Steps
Allow Walls to Dry Completely
Proper drying time is critical for successful paint adhesion. Allow walls to dry for at least 24 hours after cleaning, longer in humid conditions.
Use fans to improve air circulation and speed the drying process. Check for any remaining moisture by touching the wall surface in several locations.
Final Surface Inspection
Examine all cleaned surfaces for missed spots or cleaning residue. Light sanding may be necessary on glossy surfaces to provide better paint adhesion.
Wipe all surfaces with a tack cloth to remove any remaining dust particles before applying primer or paint.
Applying Painter’s Tape
Once walls are clean and dry, apply painter’s tape to protect trim, fixtures, and other surfaces you do not want painted. Press tape edges firmly to prevent paint bleeding underneath.
Common Mistakes When Preparing Walls for Painting
Using harsh chemicals can damage existing paint and create surface problems. Stick to mild cleaning solutions unless dealing with specific contamination issues.
Failing to rinse properly after cleaning leaves residue that interferes with paint adhesion. Always follow cleaning with clean water rinses and complete drying.
Starting to paint on walls that have not dried completely creates adhesion problems and can trap moisture under the new paint film.
When to Call Professional Painters
Complex wall conditions such as extensive water damage or multiple paint layers may require professional expertise. OnDemand Painters and similar professional services have the experience and tools to handle challenging preparation situations.
Large projects can be time-consuming for homeowners to complete properly. Consider the cost-benefit analysis of your time versus professional labor, especially for whole-house painting projects.
Professional painters also carry insurance and warranties that protect you from problems that might arise during the preparation and painting process.
Proper wall preparation through thorough cleaning creates the foundation for a successful paint job. Taking time with these important steps ensures your new paint will look better and last longer. For complex projects or when time is limited, professional painters like OnDemand Painters bring the expertise needed to achieve excellent results while saving you time and effort.
FAQs
What do you use to wash walls before painting?
Use a mild detergent mixed with warm water to clean walls effectively. Apply the solution with a damp cloth or non-abrasive sponge, working in small sections from top to bottom.
Can I use dish soap to wash walls before painting?
Yes, dish soap works well to prep walls for painting. Mix a few drops with warm water to create an effective cleaning solution that removes grease and grime without leaving residue.
Why don’t professional painters wash walls before painting?
Professional painters do clean walls – it’s a standard part of preparing walls for any quality paint job. They understand that proper surface preparation prevents paint failure and extends the life of their work.
What is the easiest way to wash walls?
The easiest method for preparing walls is using a spray bottle filled with mild cleaning solution. Spray the surface, wipe with a microfiber cloth, then rinse with clean water to remove any cleaning residue.
How long should walls dry after washing before painting?
Clean walls need at least 24 hours to dry completely before painting. Use fans to improve air circulation and check that surfaces feel completely dry before applying primer or paint.
Do I need to rinse walls after cleaning them?
Yes, always rinse clean walls with fresh water after washing to remove any soap residue. This step is crucial when preparing walls because leftover cleaning agents can interfere with paint adhesion.

