Painting baseboards might seem like a simple task, but achieving professional-quality results requires expertise, proper tools, and proven techniques. OnDemand Painters has completed thousands of baseboard painting projects across multiple locations, developing methods that ensure perfect results every time. From surface preparation to final touch-ups, this guide provides professional insights for achieving those perfect, crisp lines and durable finishes that stand up to daily wear and tear.
Key Takeaways
- Proper preparation and careful surface cleaning are essential before you paint baseboards including thorough degreasing and addressing all repairs
- Using the right tools, including quality painters tape and fine-grit sandpaper, helps achieve professional-looking results and crisp lines
- Apply primer coat when working with bare wood, covering dark colors, or making major repairs to ensure proper paint adhesion
- For best results, apply a second coat after the first coat has dried completely with thin, even layers providing better coverage than one thick coat
- Baseboard paint should be applied systematically in small sections, maintaining a wet edge to prevent lap marks and ensure even coverage
- If this seems like too much work, let OnDemand Painters handle the project while you do something more fun!
Essential Tools and Materials for Painting Baseboards
Success starts with having the right tools ready before beginning the project. A complete stop mid-project can affect the finish quality, so gathering all necessary supplies upfront is crucial.
Basic Tools
- Drop cloth or plastic sheeting for floor protection
- Quality painters tape for clean lines
- 120-grit and 220-grit sandpaper for different stages
- 2-inch putty knife for tape application and repairs
- Wood filler for holes and dents
- High-quality 2-inch angled brush
- Small foam roller for larger sections
- Semi-gloss or high-gloss paint
- Clean rags and tack cloth for surface preparation
- Utility knife for tape removal
- Eye protection and gloves
Alternative Tools and Materials
Consider these additional tools for enhanced results: sanding block for better control, sanding sponge for primer smoothing, abrasive hand pads as sandpaper alternative, 5-in-1 painter’s tool for scraping and prep, paint shield for floor protection, rigid plastic shields for carpet work, TSP cleaner for heavy-duty cleaning, caulk gun for gap sealing, and spackling compound for repairs.
Surface Preparation and Assessment
Examining Your Baseboards
Proper preparation determines the quality of the final result. Begin by examining baseboards carefully for common issues that need addressing. Peeling or bubbling paint requires complete removal. Nail holes need filling with quality wood filler, while larger dings or dents might need multiple applications. Check caulk lines where baseboards meet walls – old caulk often needs replacement. Sand previous paint drips smooth, and inspect carefully for water damage near exterior walls.
Common Baseboard Problems
Look for paint drips from previous jobs, loose or flaking paint that needs removal, dings and dents from furniture contact, pet stains requiring special treatment, and previous brush marks that need smoothing.
Surface Cleaning
A thorough cleaning with degreasing cleaner removes years of accumulated residue. Hairspray, pet stains, and general grime can all affect paint adhesion. Industry experts know that a properly cleaned surface makes the difference between paint that lasts and paint that peels prematurely.
For stubborn stains, use TSP cleaner application, specialized pet stain treatment techniques, and focus extra attention on high-traffic areas and doorway deep cleaning.
Sanding and Dust Removal
Start with 120-grit sandpaper for initial smoothing, then progress to 220-grit for the final finish. Vacuum between sandings and wipe with a tack cloth twice to ensure complete dust removal. Quality results come from thorough preparation – rushing this stage leads to visible imperfections in the final finish.
Use sanding blocks for better control, sanding sponges for primer coats, and proper dust nib removal methods. Pay special attention to corner and edge sanding techniques.
Caulking and Gap Filling
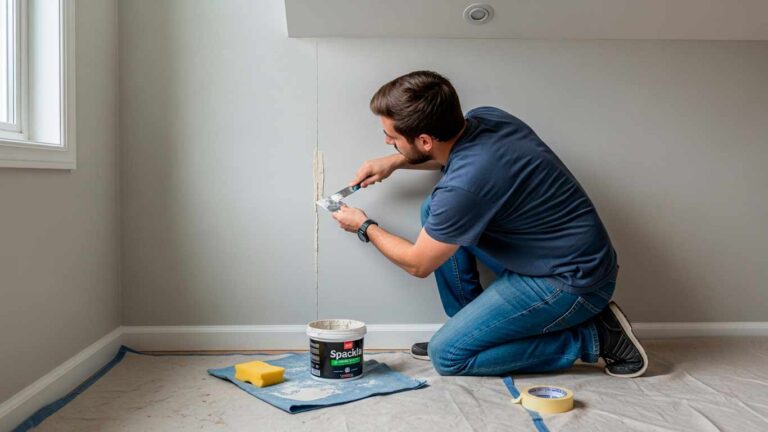
Use a caulk gun for proper gap sealing between trim and wall. Apply spackling compound to nail holes and dents, allowing proper drying time between applications. This step ensures a smooth, professional-looking surface.
Protection and Preparation Strategies
Protection techniques go beyond simply avoiding mess – they’re crucial for achieving clean lines and professional results. Begin by laying a drop cloth on the floor, then add plastic sheeting taped directly to the wall for a complete protective barrier.
Special Situations and Room Considerations
Carpeted areas require special attention, using rigid plastic shields pressed firmly against carpet fibers to prevent paint seepage. Consider quarter round and shoe molding as separate elements requiring individual attention. Door jambs need careful preparation and protection, while high-traffic areas require extra prep work.
Keep pets away during the drying process, ensure proper ventilation for family safety, and establish child-safe work areas with controlled room access.
Step-by-Step Painting Process
Surface Preparation
Start with a thorough vacuum of the entire area, then wipe down baseboards with degreasing cleaner in small, manageable sections. Complete drying time is essential before proceeding. High-traffic areas and doorways require extra attention due to increased wear and potential damage.
Tape Application
Starting from corners, apply tape in two-foot sections for optimal control. Use a putty knife to press edges down firmly, checking continuously for bubbles or gaps where paint could seep through.
For advanced results, use the score the seam technique for clean lines, apply specialized textured wall taping techniques, and master carpet edge tucking methods. Prepare for 45-degree angle removal by scoring lightly where tape meets the baseboard.
Priming Process
Several conditions necessitate priming: bare wood, dark color coverage, stain treatment, major repairs, or transitioning from oil-based to latex paint. Apply primer using steady, even strokes in three-foot sections.
Use stain-blocking primer for difficult surfaces, ensure proper ventilation during application, and optimize primer drying time based on environmental conditions.
Paint Application Methods
Begin painting in corners, maintaining consistent three-foot working sections. The process requires systematic application: first the top edge using an angled brush, followed by the bottom edge with careful floor awareness. Fill middle sections using horizontal strokes, maintaining a wet edge throughout to prevent visible lap marks.
Master cutting in methods and brush control, maintain brush stroke consistency and rhythm, and apply multiple thin coats rather than thick coats. Focus on lap mark prevention strategies while maintaining a wet edge throughout the process.
Troubleshooting Common Application Issues
Address brush mark elimination techniques, prevent and correct drip marks, identify missed spots under proper lighting, and master touch-up procedures for small areas. Time second coat application properly for best results.
Finishing and Cleanup
Proper Tape Removal Process
Remove tape while paint is still slightly wet for best results. Score the seam before removal, pull at a 45-degree angle, and use clean line achievement methods for professional results.
Final Inspection and Touch-ups
Inspect work under proper lighting conditions, use appropriate touch-up brush techniques, remove any dust nibs from the final coat, and time second coat application properly.
Common Mistakes to Avoid
Avoid inadequate surface cleaning, poor material selection, incorrect application thickness, and skipping primer when needed. Don’t work under inadequate lighting, use wrong brush selection for paint type, ignore temperature fluctuation issues, or rush between coats.
Never leave tape on too long, fail to score seams before removal, provide inadequate carpet protection, or use poor corner taping technique.
Advanced Tips for Lasting Results
Temperature and humidity significantly affect paint drying and finish quality. Monitor environmental conditions, ensure proper ventilation, and consider seasonal factors. Apply multiple coats with proper timing, conduct quality inspection under different lighting conditions, and consider long-term durability factors.
Conclusion
While painting baseboards remains a manageable DIY project, achieving professional-quality results requires attention to detail, proper preparation, and proven techniques. OnDemand Painters brings years of expertise to every project, ensuring flawless finishes through tested methods and quality materials. Whether choosing DIY or professional installation, following these guidelines helps ensure beautiful, lasting results that enhance any room’s appearance.
FAQs
How to paint baseboards without getting paint on the walls?
Use high-quality painters tape along the wall edge and press firmly with a putty knife to prevent paint seepage. Remove tape while paint is still slightly wet for clean, straight lines.
What type of painters tape works best for baseboard painting projects?
Quality painters tape designed for clean removal works best. Press the tape edges down firmly and remove at a 45-degree angle while the baseboard paint is still slightly wet to avoid peeling.
What kind of baseboard paint should I use for the best results?
Semi-gloss or high-gloss baseboard paint provides durability and easy cleaning. Water-based paint offers easier cleanup, while the paint finish should complement your wall paint color scheme.
Should I paint wall paint or baseboard trim first?
Paint your wall paint first, then protect the walls with tape before painting baseboard trim. This order makes it easier to achieve clean lines between the wall and baseboard surfaces.
How do I prepare previously painted areas before applying new paint?
Clean previously painted areas thoroughly with degreasing cleaner, sand lightly to help new paint adhere, and fill any holes or dents. Prime if transitioning between paint types or covering dark colors.
How long should I wait until paint dries between coats?
Allow the first coat to dry completely before applying a second coat – typically 2-4 hours depending on humidity and temperature. Check that paint dries to the touch and doesn’t feel tacky before proceeding.


